Showing posts with label Tomcat. Show all posts

Saturday, 20 February 2021

Datadog - Continuous Monitoring


How to enable Apache Tomcat monitoring in Datadog Agent


Datadog is a monitoring service for cloud-scale applications that brings events and metrics from servers, databases, applications, tools and services to present a unified view of the infrastructure, which help them to work collaboratively on the infrastructure to avoid latency, resolve performance problems, and ensure that development and deployment cycles finish on time.

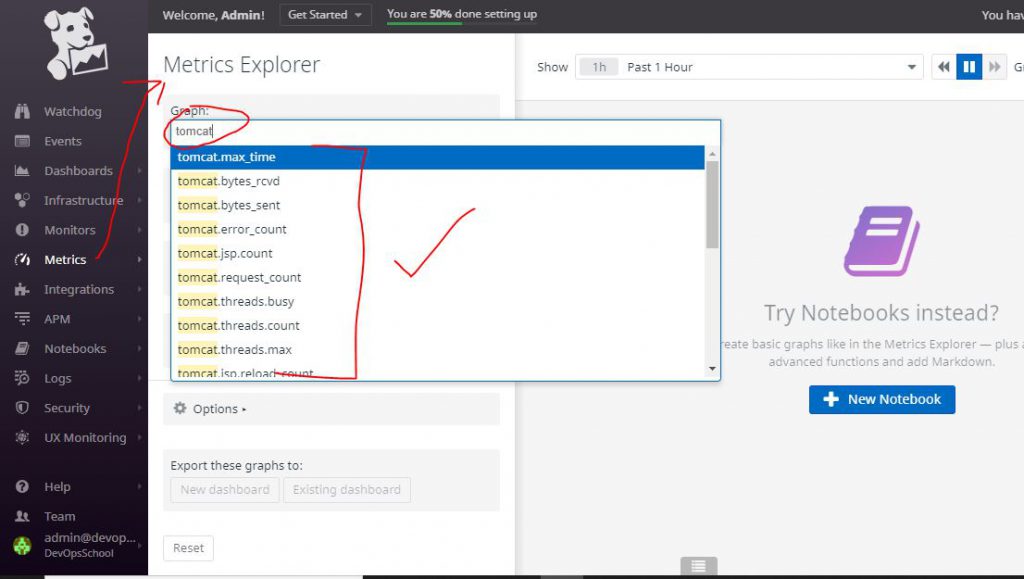
Apache Tomcat Integratoion with Datadog collects Following Tomcat metrics

  • Overall activity metrics: error count, request count, processing times, etc.
  • Thread pool metrics: thread count, number of threads busy, etc.
  • Servlet processing times

Step 1 – Sign up for a Datadog Account

Click on Free Trial

Fill the form to sign up

Next: Select your Stack. You can select Tomcat for now


Step 2: Install the datadog Agent on your Tomcat Server


Select your OS: Ubuntu

Then copy the command in the box: Use our easy one step install


Log into your Tomcat server and paste and run the command to install datadog agent

DD_AGENT_MAJOR_VERSION=7 DD_API_KEY=4cf1ee64a11f9c21c2020b85376e552c DD_SITE="datadoghq.com" bash -c "$(curl -L https://s3.amazonaws.com/dd-agent/scripts/install_script.sh)"


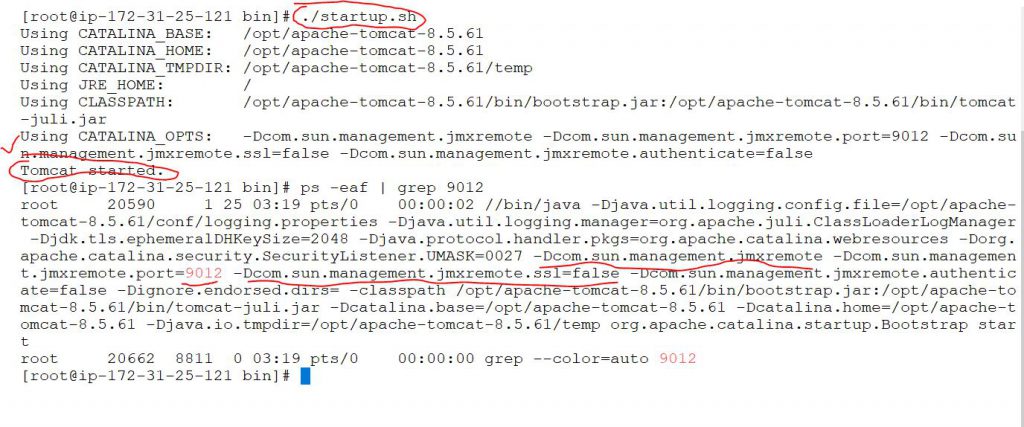
How to enable JMX Remote in Tomcat 8 to Monitor & Administer?

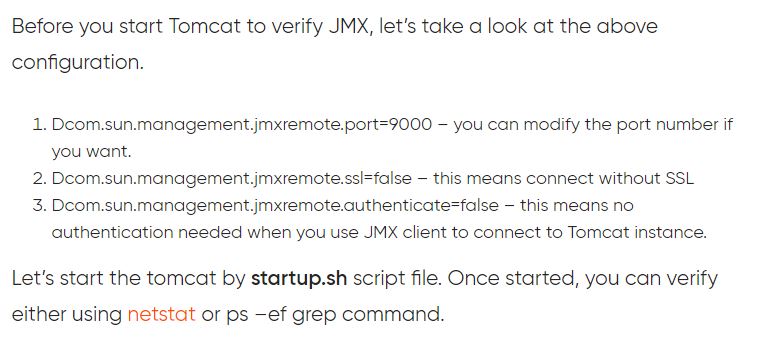
Modify catalina.sh file by adding the below lines
$ sudo vi /usr/share/tomcat8/bin/catalina.sh


CATALINA_OPTS="-Dcom.sun.management.jmxremote -Dcom.sun.management.jmxremote.port=9012 -Dcom.sun.management.jmxremote.ssl=false -Dcom.sun.management.jmxremote.authenticate=false"

Save: wq!
Restart the process
$ cd /usr/share/tomcat8/bin/

$ ./shutdown.sh

$ ./startup.sh
Reference

  • https://tomcat.apache.org/tomcat-8.0-doc/monitoring.html#Enabling_JMX_Remote
How to configure and enable Tomcat intergration in Datadog agent?

$ cd /etc/datadog-agent/conf.d/tomcat.d/
$
cp conf.yaml.example conf.yaml
$
datadog-agent configcheck
$
systemctl restart datadog-agent
$
systemctl status datadog-agent
$
datadog-agent config
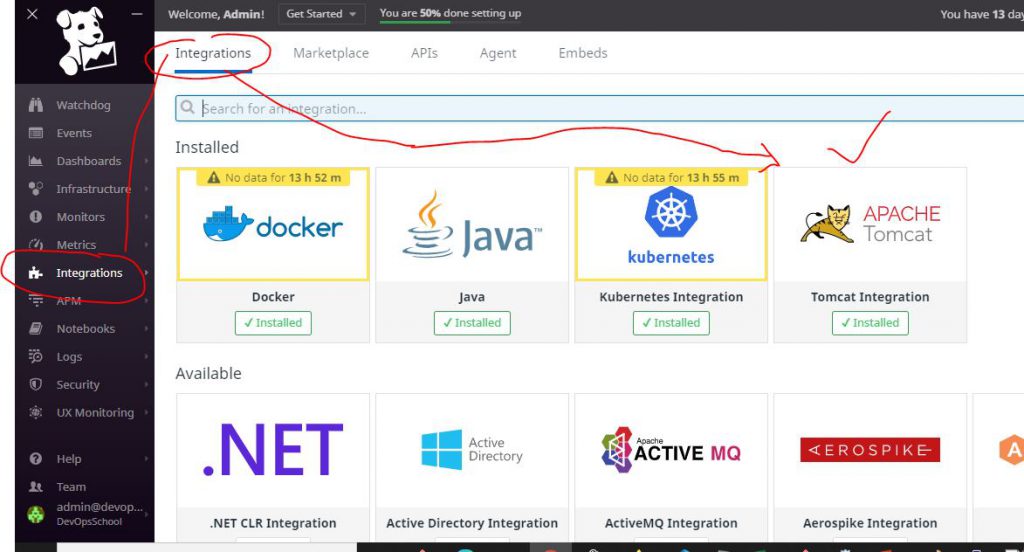
Next Go to your Datadog account: Integrations


Search for Tomcat and install it
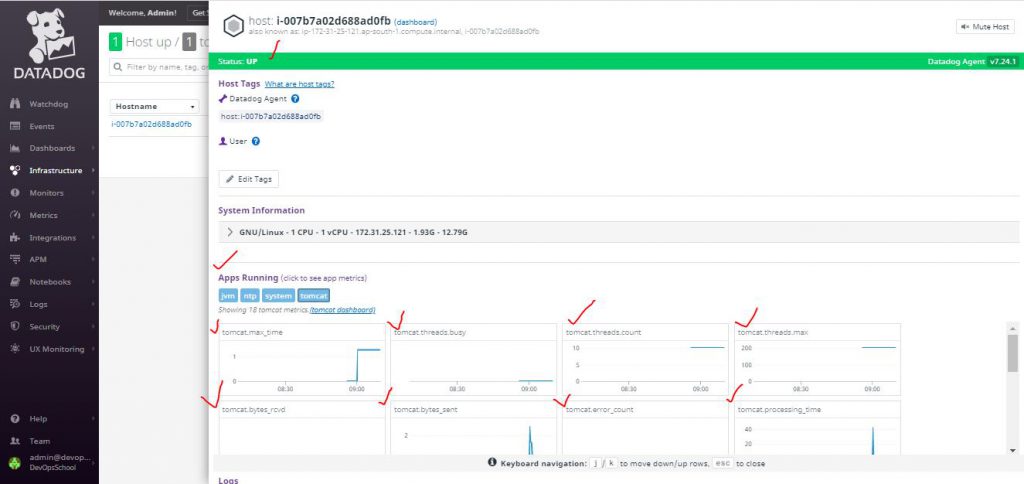
Click on Infrastructure--Infrastructure List:

Select your host: And you should see the metric graphs


Friday, 18 September 2020

End to End Automation of Java web App Using jenkins, bitbucket,sonaqube,Maven,Tomcat,Artifactory,Slack

 Tools Used:

  • Bitbucket— Source Code Management
  • Maven — Build Tool
  • Jenkins — Continuous Integration (CI/CD)
  • Artifactory — Artifact Repository Manager
  • SonarQube — Code Quality and Code Analysis
  • Tomcat — Application Server(Web container)


What is the Requirement? - Setup MyDevopsApp Java Project using Maven in Bitbucket and Automate end to end Builds, Code quality checks, Deployments and Collaboration using Jenkins and other Devops tools we have used so far. Could you please work on below lab exercise on a brand new EC2 instance(small instance) and show the output when we meet on next week end?


Lab Exercise Steps:
1. Also, create a repo called MyAutomationRepo in bitbucket. (lab exercise # 5)
2. Create a Java project called MyDevopsApp (instead of MyWebApp which we did before (lab exercise #5) using Maven.
3. Set the above project in Bitbucket(lab exercise #5)
4. Set up a free style job called MyDevopsFreeStyleJob (use webhooks,lab exercise #6, lab exercise # 8) in Jenkins and automate builds, deployments to Tomcat server (lab exercise #6). Also integrate with SonarQube to see the code quality report(lab exercise #10). Finally Jenkins should deploy to Tomcat immediately if there is a code change(lab exercise #7, lab exercise 8). Also jenkins should upload WAR into Artifactory as well. (lab exercise # 17, lab exercise 18). And send notifications to Slack(lab exercise # 19)
5 Finally show the below output in Tomcat by modifying index.jsp (lab exercise #6) in your java project. 
       Congrats I am now a Devops Engineer I Can Migrate App to cloud using Bitbucket,Jenkins,Maven and Tomcat!!!
6. SonarQube dashboard should be viewed in Sonarqube.
7. Artifactory should show uploaded artifacts as well.
8. Slack should show the message coming from Jenkins for every build success/failure.

Tips:

You all know the maven command to create a Java project using Maven and where you to change the word MyWebApp to MyDevopsApp.
mvn archetype:generate -DgroupId=com.mkyong -DartifactId=MyWebApp -DarchetypeArtifactId=maven-archetype-webapp -DinteractiveMode=false

Tuesday, 1 September 2020

How to make Code changes directly in Bitbucket and remotely In your Project (local Machine)with Vscode

 steps to make a code change in Bitbucket to trigger builds in Jenkins and view results in Tomcat.


How to make sure code change to trigger automated build? you can do in one of two ways:

1. Make code changes directly in bitbucket which are given below:
2. change in your computer after cloning. refer to steps given in lab exercise #2

How to make code changes directly in bitbucket?

1. Go to https://www.bitbucket.org
2. Click on repo you had created earlier and configured in jenkins freestyle job or pipeline.
3. Click on MyWebApp
4. Click on src/main/webapp
5. Click on index.jsp
6. Click on Edit and make the change highlighted in yellow:

<html>
<body>
<h2>Hello Guys !!! Im a DevOps Engineer!</h2>
</body>
</html>
7. Commit (no need to create a pull request for this change)
8. Now this should have triggered automated build/deployment in Jenkins.
9. Go to browser, enter public dns name where tomcat is deployed to see output in the browser
10. Now you should see the output in the browser

Hello Guys !!! Im a DevOps Engineer!

Next Go to Your Project on you local machine

Right click and open Git Bash Here
Type code . to load the project into Vscode

Click on the Pull/push icon to get the latest changes from your repo
Navigate to MyWebApp--src--main--webapp and click on index.jsp. This is the main code of your web application
Edit the code. Add Devops is the Next best thing in IT!
Click file--- save

The Source control icon will indicate you have pending changes

Enter a commit message in the Message prompt the click the check symbol to save the commit and click Yes to Stage


You will notice there is 1 pending change to your local repo. Click the Push/Pull icon to update this changes to your remote repo
This will automatically push changes to your repo and trigger a new build in Jenkins.
Go to browser, enter public dns name where tomcat is deployed to see output in the browser
Now you should see the output in the browser

Devops is the Next best thing in IT!