Before containerization came into the picture, the leading way to isolate, organize applications and their dependencies was to place each and every application in its own virtual machine. These machines run multiple applications on the same physical hardware, and this process is nothing but Virtualization.
But virtualization had few drawbacks such as the virtual machines were bulky in size, running multiple virtual machines lead to unstable performance, boot up process would usually take a long time and VM’s would not solve the problems like portability, software updates, or continuous integration and continuous delivery.
These drawbacks led to the emergence of a new technique called Containerization. Now let me tell you about Containerization.
Containerization
Containerization is a type of Virtualization which brings virtualization to the operating system level. While Virtualization brings abstraction to the hardware, Containerization brings abstraction to the operating system.
Moving ahead, it’s time that you understand the reasons to use containers.
Reasons to use Containers
Following are the reasons to use containers:
- Containers have no guest OS and use the host’s operating system. So, they share relevant libraries & resources as and when needed.
- Processing and execution of applications are very fast since applications specific binaries and libraries of containers run on the host kernel.
- Booting up a container takes only a fraction of a second, and also containers are lightweight and faster than Virtual Machines.
Now, that you have understood what containerization is and the reasons to use containers, it’s the time you understand our main concept here.
What is Docker?
Docker is a platform which packages an application and all its dependencies together in the form of containers. This containerization aspect ensures that the application works in any environment.
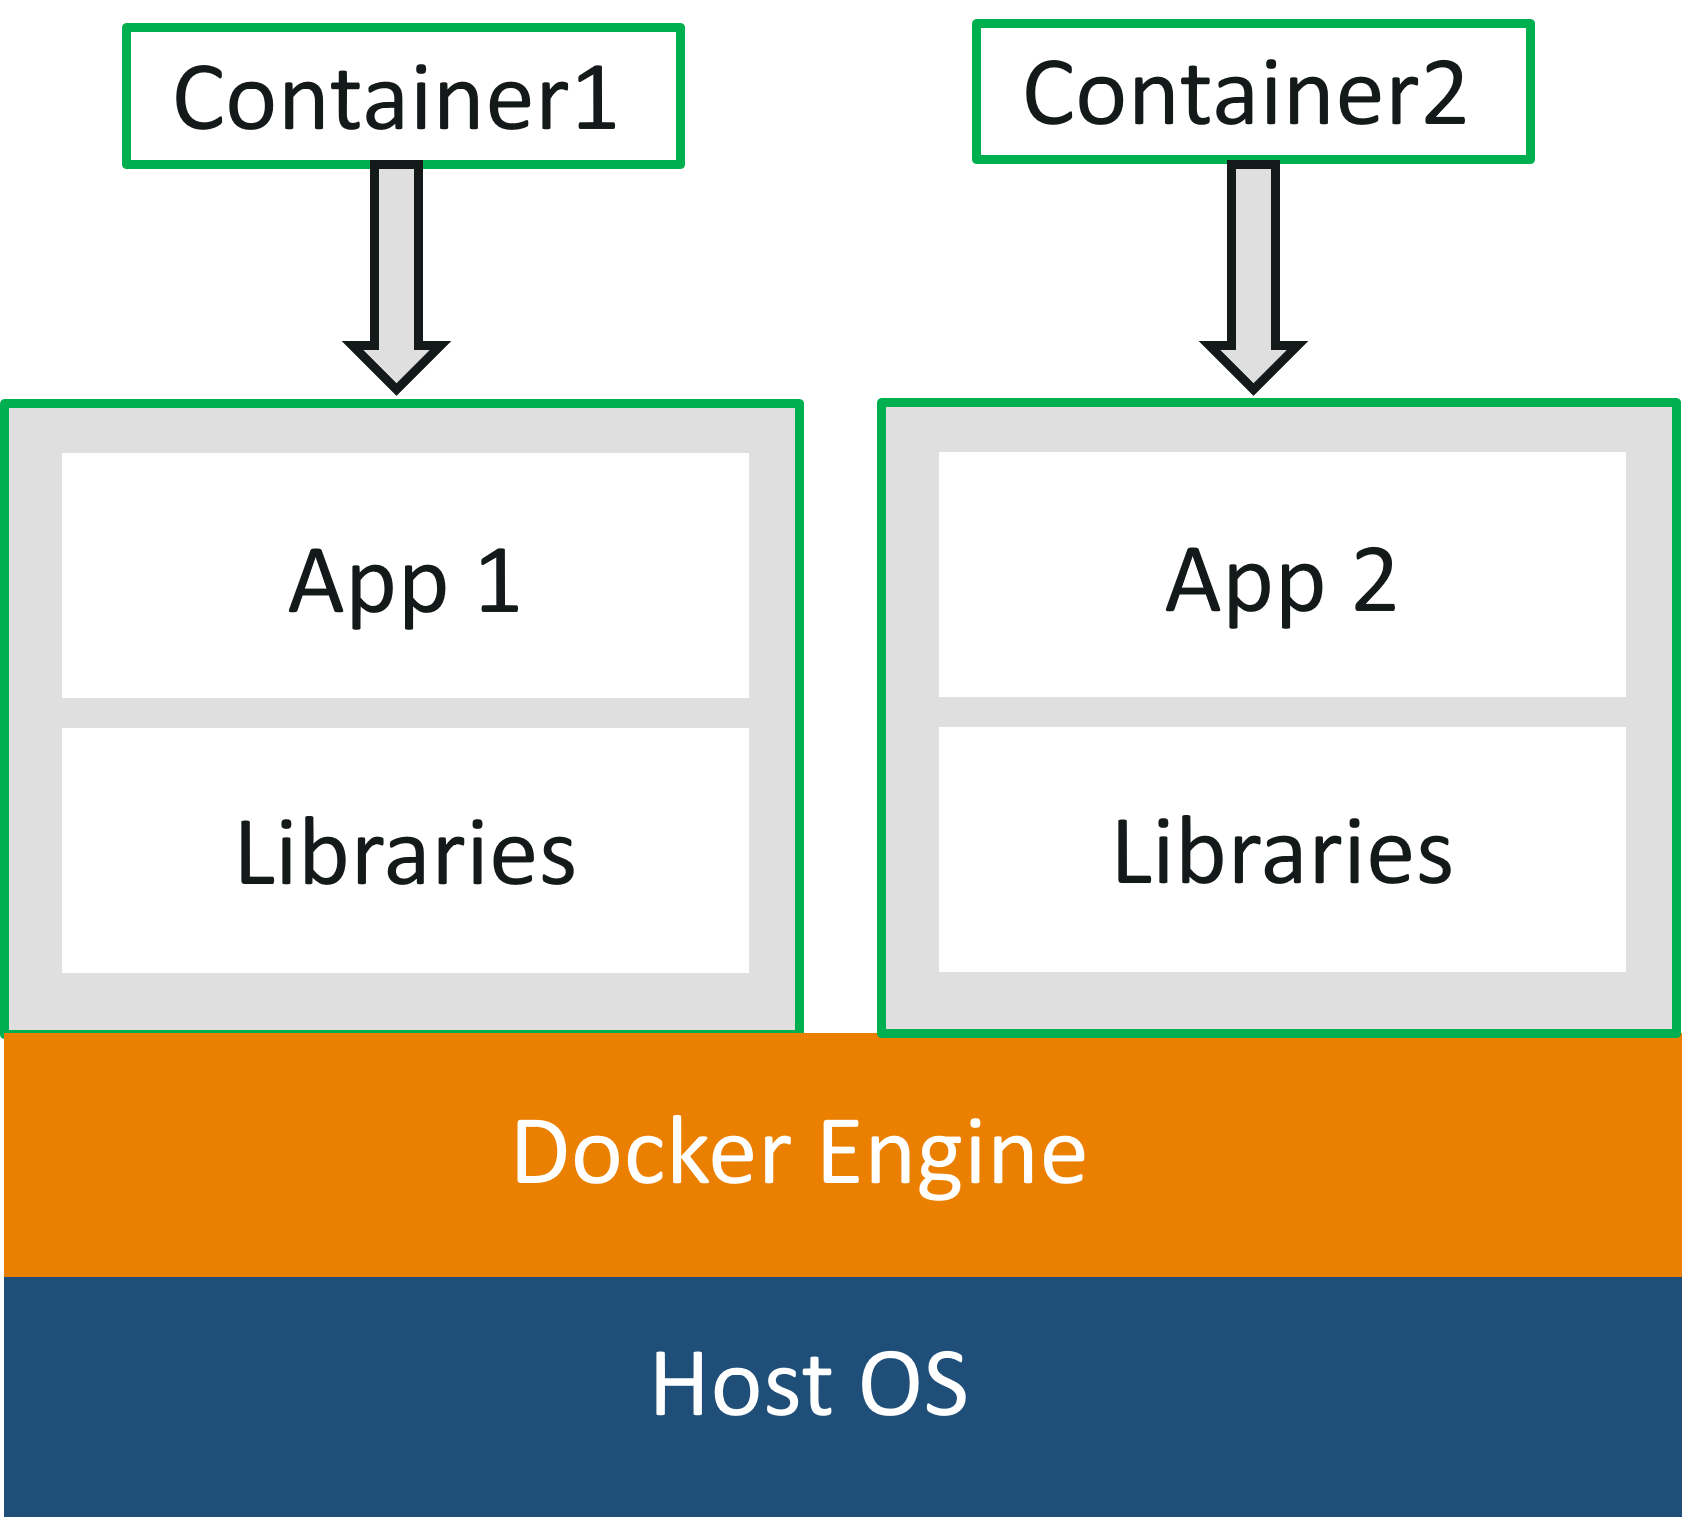 As you can see in the diagram, each and every application runs on separate containers and has its own set of dependencies & libraries. This makes sure that each application is independent of other applications, giving developers surety that they can build applications that will not interfere with one another.
So a developer can build a container having different applications installed on it and give it to the QA team. Then the QA team would only need to run the container to replicate the developer’s environment.
Dockerfile, Images & Containers
Dockerfile, Docker Images & Docker Containers are three important terms that you need to understand while using Docker.

As you can see in the above diagram when the Dockerfile is built, it becomes a Docker Image and when we run the Docker Image then it finally becomes a Docker Container.
Refer below to understand all the three terms.
Dockerfile: A Dockerfile is a text document which contains all the commands that a user can call on the command line to assemble an image. So, Docker can build images automatically by reading the instructions from a Dockerfile. You can use docker build to create an automated build to execute several command-line instructions in succession.
Docker Image: In layman terms, Docker Image can be compared to a template which is used to create Docker Containers. So, these read-only templates are the building blocks of a Container. You can use docker run to run the image and create a container.
Docker Images are stored in the Docker Registry. It can be either a user’s local repository or a public repository like a Docker Hub which allows multiple users to collaborate in building an application.
Docker Container: It is a running instance of a Docker Image as they hold the entire package needed to run the application. So, these are basically the ready applications created from Docker Images which is the ultimate utility of Docker
Docker Compose
Docker Compose is a YAML file which contains details about the services, networks, and volumes for setting up the application. So, you can use Docker Compose to create separate containers, host them and get them to communicate with each other. Each container will expose a port for communicating with other containers
With this, we come to an end to the theory part of this Docker Explained blog, wherein you must have understood all the basic terminologies.
In the Hands-On part, I will show you the basic commands of Docker, and tell you how to create a Dockerfile, Images & a Docker Container
Docker installation On Ubuntu
sudo apt-get update
sudo apt install docker.io
sudo systemctl start docker
sudo systemctl enable docker
To verify the installed Docker version number, enter:docker --version
Verify that Docker Engine is installed correctly by running the hello-world image.
$ sudo docker run hello-world

Hands-On
Follow the below steps to create a Dockerfile, Image & Container.
Step 1: create a folder in which you can create a DockerFile and change the current working directory to that folder.
12 mkdir imagescd images

Now create a Dockerfile by using an editor. I use Vi
After you open a Dockerfile, you have to write it as follows
FROM ubuntu:latestMAINTAINER Sahiti (email@domain.com)RUN apt-get updateRUN apt-get install -y nginxENTRYPOINT ["/usr/sbin/nginx","-g","daemon off;"]EXPOSE 80

- FROM: Specifies the image that has to be downloaded
- MAINTAINER: Metadata of the owner who owns the image
- RUN: Specifies the commands to be executed
- ENTRYPOINT: Specifies the command which will be executed first
- EXPOSE: Specifies the port on which the container is exposed
Once you are done with that, just save the file.
Build the Dockerfile using the below command.
1 docker build -t devops-app .
** “.” is used to build the Dockerfile in the present folder **
do docker images to show the image that just be built  Once the above command has been executed the respective
 docker image wii be created. To check whether Docker Image is created
or not, use the following command.
docker images

Now to create a container based on this image,
you have to run the following command:
docker run -it -p port_number -d image_id
docker run -itd -p 8085:80 9cdd37834923
Where -it is to make sure the container is interactive,
-p is for port forwarding, and -d to run the daemon in the background.

We will use Port 8085:80 Make sure these ports are open

Now you can check the created container by using the following command:
docker ps -a

Thats it folks! To view your ngnix container, go to ip_address:8085 👊👊👊👊👊👊👊😊 You will see something like this below


No comments:
Post a Comment